Introduction to OneDrive
Storing your individual files and folders
OneDrive is your individual storage space for University files and folders. It can be accessed from most internet-connected devices and offers a default 50GB storage capacity.
To reduce digital waste, users are encouraged to keep storage focused on core University work and undertake regular Digital Housekeeping to eliminate ROT data (Redundant, Obsolete, or Trivial files). This directly supports the University’s Sustainability Strategy and Digital Decarbonisation research at Loughborough Business School. By reducing the accumulation of 'Dark Data', the forgotten files that sit unused in storage, we can significantly lower the hidden carbon footprint of our digital habits.
Storage Limits and 'Read-Only' Status
If you exceed the 50GB limit, your OneDrive will enter 'Read-Only' status. Your files will remain safe and accessible, but you will not be able to upload new content or save changes until space is cleared or an increase is granted.
If, after undertaking your digital housekeeping, you still require additional storage for University work, please request a storage increase by completing the Storage Quota Request form.
Collaboration Note: OneDrive is intended for individual work files. For folders requiring continuous team access, Microsoft Teams is the University’s preferred option.
Access
OneDrive Sync Client
The OneDrive Sync Client is installed on all managed University devices and on all computers. This is the blue cloud icon that can be located on the bottom right-hand side of the taskbar.
It allows you to save files directly to your OneDrive storage space, like saving your Documents. This is quicker and easier than uploading via the web version of OneDrive.
Allow time for files to sync to OneDrive.
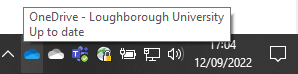
The status of files syncing to OneDrive can be checked by clicking the OneDrive (cloud) icon. This will launch the activity window confirming sync or error status.
When using computers on campus (in person or remote access) always remember to check that your work has been saved/synced to your OneDrive account, (blue cloud icon in the taskbar) before signing out.
OneDrive on your personal device
To download and setup OneDrive on a personal device, use the instructions below, selecting the relevant device:
Windows device: OneDrive - Setup instructions for Windows | IT Services | Loughborough University
macOS device: OneDrive - Setup instructions for macOS | IT Services | Loughborough University
Quick guides
The below guides have been put together as quick reference to help with some of the most common OneDrive tasks.
Individual Digital Housekeeping
How to check your OneDrive space
The easiest way to check your current OneDrive storage usage is to open the online version of OneDrive at: https://lunet-my.sharepoint.com/
Once you’re signed in, you’ll see your storage usage displayed in the bottom‑left corner of the page. This will show both your current usage and the total available space.
Why personal files are best kept outside University OneDrive
University OneDrive is an excellent space for university work. Personal files are better kept in a private account, so they remain available even if you no longer have access to your University OneDrive.
Here’s why separating them makes sense:
You won't have lifelong access
University accounts are closed when you leave. Personal files stored in University OneDrive may no longer be accessible once your employment ends.
Personal services should not rely on a work account
Using a University email for personal services (e.g. banking, subscriptions, personal cloud storage, Google Scholar) risks losing access when the account is deactivated. A personal email ensures continuity.
Better security for everyone
Keeping personal and work files separate reduces risk. University data must stay on University systems, and personal data is safer when managed under your own accounts and passwords.
Access for family in the event of bereavement
During a time of loss, navigating administrative requirements can be challenging. Because of the legal and privacy protections surrounding University accounts, they may not be easily accessible to family members. We encourage staff to store personal files in private accounts, as these are much more likely to remain accessible to your loved ones in the future.
What we recommend
Use a personal cloud storage account for non‑work files. Most providers offer free and paid options, allowing you to choose what works best for you.
If this presents a disproportionate cost challenge, please contact the IT Service Desk for advice.
Note: IT Service Desk cannot assist with managing or migrating data in personal (non‑University) accounts.
How to free up space
Use OneDrive’s built-in tools to help find where space is used. These tools may take some time to update after you delete items (changes can take several hours to and up to a day to appear), so don’t be alarmed if your usage doesn’t fall immediately, check again later.
- Remove your largest files
Old video recordings, PowerPoint presentations, and photos often take up a lot of storage. Use the link below to view your largest files across your account. Select the files you no longer need, right-click, and select Delete
- Review files you've shared
Check files listed as "Shared by you". Confirm they are still required and stored in the best location. Team or collaborative files may be better placed in a Teams or SharePoint site rather than "My files".
Review "Shared by you" - Check where space is being used (optional)
This more advanced view helps you spot large folders quickly. Open OneDrive settings, then select Storage Metrics, open Documentsand sort folders by Size or Date.
Note: Files can't be deleted from this screen. - Empty your Recycle Bin
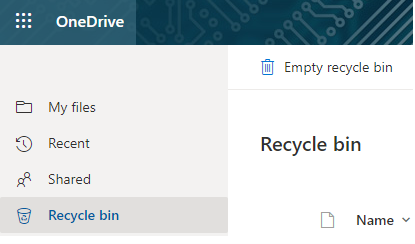
This is the final step to release storage space. Once you follow the link to your Recycle Bin, select "Empty recycle bin" at the top of the page.
Restoring a file that should not have been deleted
Your data is protected by a three-stage safety net. Deleting a file does not mean it is gone for ever; it simply moves through the following stages:
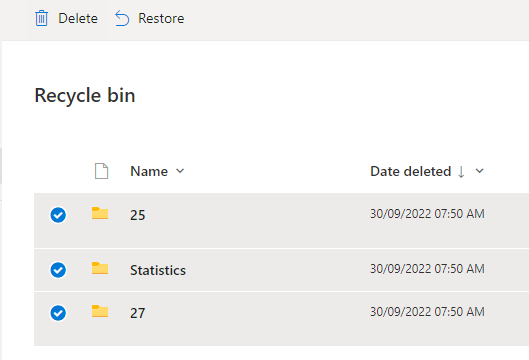
Stage 1: The Recycle Bin – When you delete a file, it stays here first. Files in this bin still count towards your storage quota. To free up your space, follow the link to your Recycle Bin and select Empty recycle bin. If you need to restore a file instead, simply select it and click Restore at the top of the page. Open your Recycle Bin
Stage 2: The Second-Stage Recycle Bin – When you empty your main Recycle Bin, files move here. Files here are no longer taking up your storage space. You can still recover files from here by selecting them and clicking Restore at the top of the page. They remain recoverable for the remainder of the 93-day retention period. Open the Second-Stage Recycle Bin
Final Protection – Never empty or delete items from the Second-Stage Bin. It does not free up any additional storage space and it means the file is gone for ever. After a total of 93 days across both bins, the file is permanently removed.
Moving files to Teams or SharePoint
Moving files from your personal OneDrive into a shared space such as Microsoft Teams or SharePoint can help reduce your individual storage usage while ensuring important University work remains accessible.
This approach is most effective when used thoughtfully. While files moved to shared spaces no longer count against your personal quota, they still consume University storage overall. Files should only be moved if they provide ongoing value to the University.
For Microsoft guidance on sharing files in Teams, review the Teams guide.
For Microsoft guidance on sharing files in SharePoint, review the SharePoint guide.
When shared spaces are the right choice
Shared locations are recommended for files that support:
- Team collaboration
Allowing multiple people or departments to access, edit, and manage the same files together. - A single source of truth
Reducing duplication and version confusion by maintaining one authoritative copy. - Business continuity
Ensuring work remains accessible if a staff member changes role or leaves the University. - Automatic access management
Permissions are managed through Team or site membership, so access is updated automatically as people join or leave.
Group Workspaces
Please note that Group Workspaces are being decommissioned and are not suitable for long‑term storage.
Reduce data sprawl: share links, not attachments
Sending attachments by email creates multiple copies of the same file across the University. Each copy consumes storage and increases the risk of version confusion.
For example, emailing a 10MB attachment to ten people results in 100MB of duplicated data.
Why sharing links is better
- Less storage usage
A single file stored in OneDrive, Teams, or SharePoint replaces dozens of duplicate attachments. - Improved version control
Everyone works from the same file, eliminating uncertainty about which version is current. - Stronger security
Access to a shared file can be changed or revoked at any time. Email attachments cannot be recalled once sent. - Less work for colleagues
Recipients do not need to store, manage, or delete duplicate copies in their own accounts.
For Microsoft guidance on attaching files in Outlook, review the Outlook guide.
Managing your inbox: the 8‑year policy
The University is introducing automated retention policies to support compliance and manage storage more effectively. Adopting these practices now will reduce the need for manual cleanup in the future.
Default retention period
New University accounts are created with a default 8‑year retention policy. This policy is being rolled out to existing accounts, but you can apply it manually now if it is not yet visible.
Retention policies preserve email for compliance purposes while automatically removing it once the retention period ends.
Customising retention
You can apply different retention periods to folders or individual emails, depending on their importance.
Apply to a folder
Right‑click the folder, select Assign policy, then choose the appropriate retention period.
Apply to an email
Right‑click the message, select Advanced actions, then choose Assign policy.
Technical note
If these options are not available in the Outlook desktop application, use Outlook on the Web, where full retention controls are always available.
For Microsoft guidance on applying retention labels in Outlook, review the Outlook retention labels guide.
Managing large datasets
Some roles and research activities require substantially more storage than the standard allocation. If your work involves very large volumes of data (for example, datasets exceeding 1TB), additional guidance applies.
Current guidance for high‑volume storage
Microsoft OneDrive remains the primary storage location for University data. Before requesting additional capacity, you must ensure your account is being used efficiently.
- Complete digital housekeeping
Follow the housekeeping steps above to remove redundant, obsolete, or temporary files. - Review shared content
Move collaborative or team‑owned files into Microsoft Teams or SharePoint where appropriate. - Request a storage increase
If additional space is still required for University work, please request a storage increase by completing the Storage Quota Request form.
Future storage options
The University is actively exploring alternative solutions for very large datasets, such as local Network Attached Storage (NAS), which may be more suitable where collaboration features are not required.
High‑storage users will be contacted directly when these options become available. Until then, please continue to use OneDrive as the primary location for work‑related data.
Uploading & Creating Files
How to create files and folders
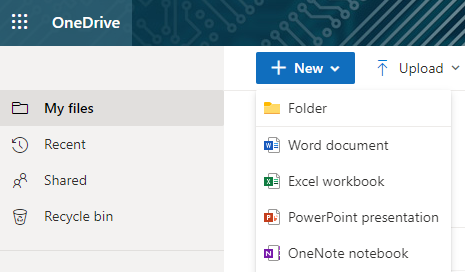
Create a file in OneDrive online
- Select New and choose the type of file you are looking to create
-
To rename the file, click the file name in the title bar, for example Document, and then type a name
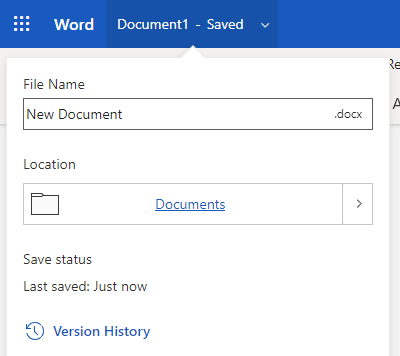
- All changes are automatically saved in the Office online apps, so when you go back to OneDrive, your new file is already saved
Create a file in an Office app
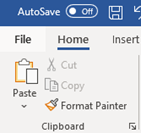
- Open a desktop app, such as Word, Excel , or PowerPoint
- Select File and then Save As
- Select your OneDrive work or school account
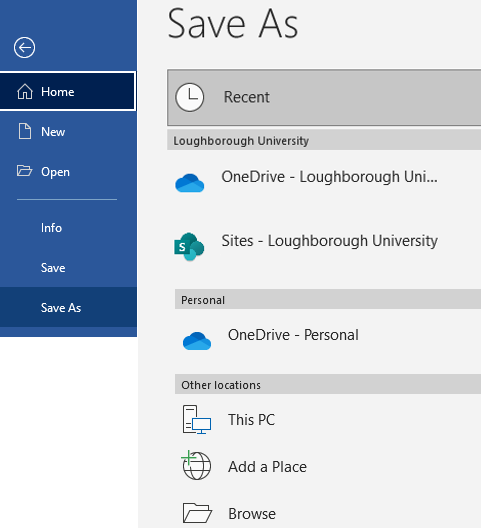
- Type a name for the file and select Save
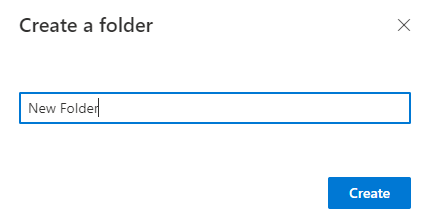
Create folders
- Select New and then Folder
- Type a name for the folder and select Create
- Select the files you want and drag them into the folder
How to upload files and folders
Upload Files or folders in a browser
- Login to your OneDrive online and select Upload
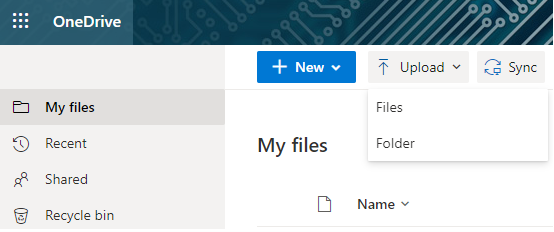
- Select the file or folder you want to upload
- Select Open
You can also upload files by opening File Explorer, selecting the files you want to upload, and dragging them to OneDrive for work or school.
Upload files and folders on the desktop
- Open File Explorer or finder and select the files or folders you want
- Dragging them into your OneDrive for work or school folder
Make sure you have set up your sync options. For more in formation on this, see
Sharing Files and Folders
How to Share files from within an app
When you save your files to OneDrive, you can sharing your them from within the applications, using a file browser or using a web browser.
Share a file from with an app
- Open the document you are looking to share and click on the Share button in the top right hand corner and select Share

- Start typing the name or email address of the person you are looking to share with if they are internal to the University or select the sharing settings and select the level of access to the file. Options include:
- Anyone (if your organization allows it)
- People in your organization
- Specific people
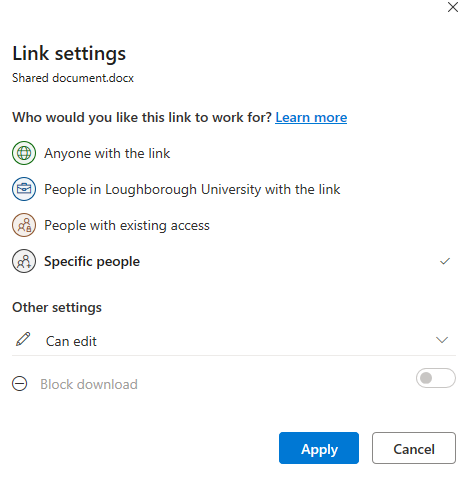
- Select the editing rights you would like people have to the document
- Can edit - Full editing rights
- Can review - Can suggest changes
- Can view - Read only and can not edit
- Select Apply to save the permissions
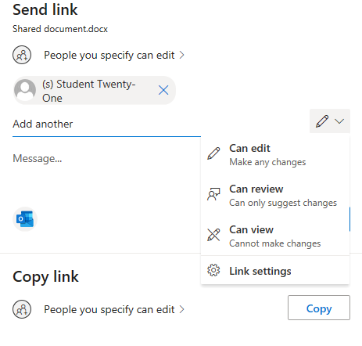
- Enter the name or email address of people you want to share with
- Type a message
- Select Send
Alternatively, you can select Copy Link and send the link in an email or add it to a file.

How to Share folders from Windows explorer
When you save your files to OneDrive, you can sharing your folders using a file browser or via a web browser from OneDrive online
Share a folder
- Open OneDrive from file explorer. Select the folder you are looking to share and right click on it and select Share
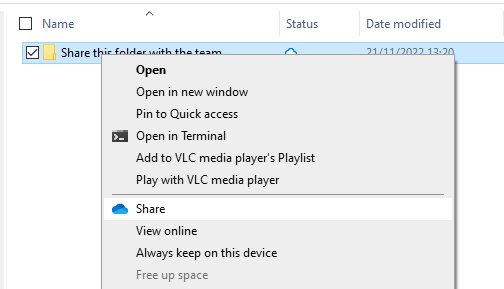
- Start typing the name or email address of the person you are looking to share with if they are internal to the University or select the sharing settings and select the level of access to the file. Options include:
- Anyone (if your organization allows it)
- People in your organization
- Specific people
- Select the editing rights you would like people have to the folder
- Can edit - Full editing rights
- Can view - Read only and can not edit
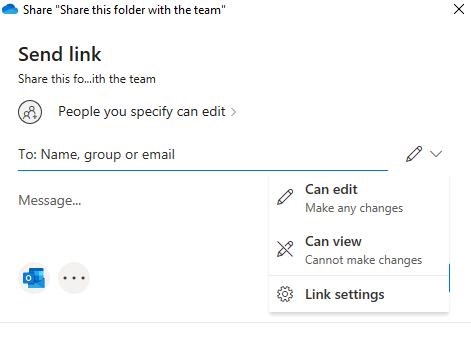
- Select Apply to save the permissions
- Enter the name or email address of people you want to share with
- Type a message
- Select Send
Alternatively, you can select Copy Link and send the link in an email or add it to a file.
Version Control
Version control automatically saves and tracks changes to your files. It’s enabled automatically in OneDrive and SharePoint (the storage behind Teams).
Version control allows you to:
- Track Changes: You can see who made changes to a document and when.
- View History (‘Version History’): You can view the history of all versions, compare them, and see what changes were made. This works with all file types including Microsoft 365 files, PDFs, CAD files, photos, videos, and more.
- Restore versions: If needed, you can revert to a previous version of the document.
For more information, visit: Microsoft feature - Version control
Deleting and Restoring
How to Restore your OneDrive
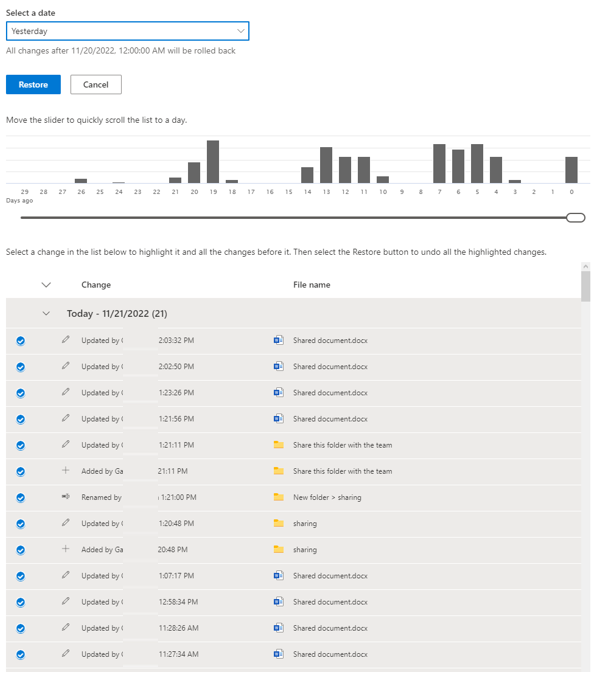
If lots of your OneDrive files get deleted, overwritten, corrupted, or infected by malware, you can restore your entire OneDrive to a previous time.
- Go to your OneDrive
- At the top of the page, select Settings > Restore your OneDrive from the left navigation
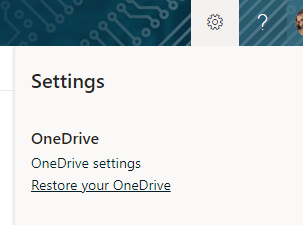
- On the Restore page, select a date from the dropdown list or select Custom date and time
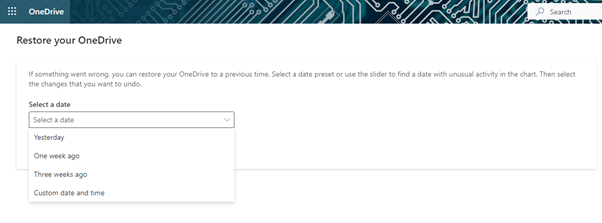
- Use the activity chart and activity feed to review the recent activities that you want to undo
Managing and Syncing your files and folders
Manage your OneDrive files
Your OneDrive files will appear in File Explorer in the OneDrive folder. If you have more than one account, your personal files appear under OneDrive – Personal and your work or school files appear under OneDrive - Loughborough University.
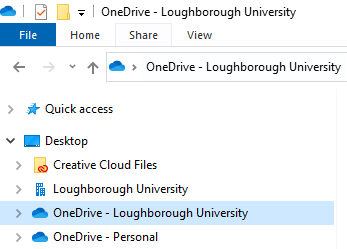
You now have a new white or blue cloud icon (or both) in your notification area in the taskbar. Your blue cloud icon will appear as OneDrive – Loughborough University when you hover over it.
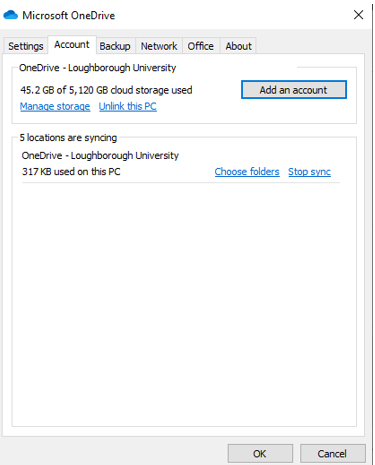
Folder sync options
Any time you want to change the folders you sync on your computer,
- Right-click the cloud icon in the taskbar notification area
- Select Settings
- Select the Account tab
- And Choose folders
You can find more information about your account and change other OneDrive settings from here.
Access your files online
To access your OneDrive online, follow these steps:
- Visit https://lunet-my.sharepoint.com to access the web version of OneDrive
- Sign in with your Loughborough University credentials (username and password) and click Login
- You will be taken directly to your Office 365 OneDrive storage space, where you can upload and access files, as well as edit them via Office Online
- You can also download and setup the OneDrive client by following the instructions on the “Setup OneDrive on your device” page
Windows: OneDrive comes pre-installed with Windows 10 onwards. The OneDrive Sync Client allows you to save files directly to your OneDrive storage space, similar to saving to your Documents.
Mac: You can download the OneDrive Sync Client via the App Store (requires Mac OS X Catalina 10.15 or above). If you are currently using the OneDrive, you may need to first uninstall your current version and reinstall the latest build.
FAQs and troubleshooting
For additional advice and troubleshooting guidance, please see the page below: