Windows TCP/IP v4 guide
Configure networking settings on your PC
Ethernet cable
- Connect the Ethernet cable to your device and the socket on the wall in your room. If your room has two then generally it’s the left-hand socket
Control Panel
- Pressing the Windows key and type Control Panel
Access Network and Internet Connections
- Underneath Network and Internet
- Click View Network Status and Tasks
- Click on Change adapter settings
Select Local Area Connection
- Right click on Ethernet
- Click Properties
Select Internet Protocol Version 4 (TCP/IPv4)
- Select Internet Protocol Version 4 (TCP/IPv4) and then click on the properties button at the bottom.
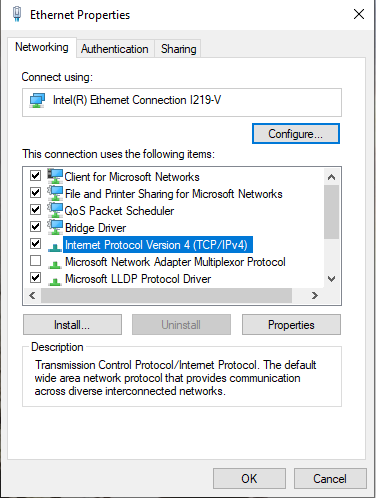
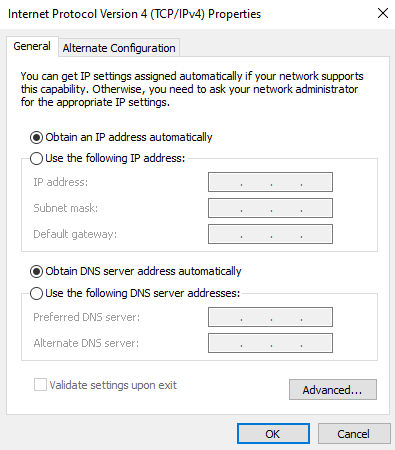
Internet Protocol Version 4 (TCP/IPv4) Properties Menu
- Select the General tab
- Check that Obtain an IP address automatically is selected
- Check that Obtain DNS server address automatically is selected
- Then click on the Advanced button at the bottom
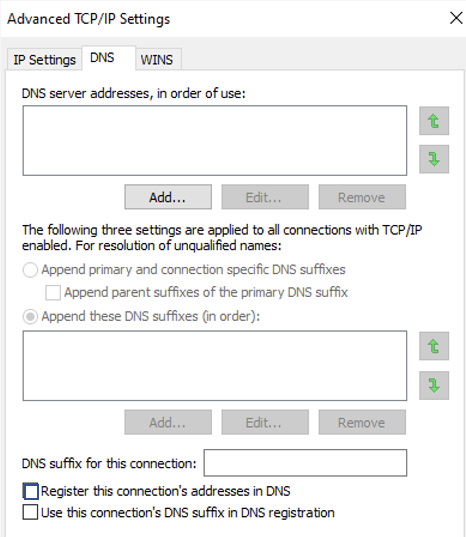
Select the DNS tab
Select the DNS tab at the top and ensure that Register this connection's addresses in DNS is not selected
Accept the changes
- Click OK
- Click OK again
- Click Close
Close the Network Connections and Network and Sharing Centre windows and reboot your computer if prompted to.