How to connect my macOS device to eduroam
You will need to know your Loughborough University username and password before you can start this process.
To connect to eduroam your device must have a supported, up to date and licenced operating system. Please ensure your Apple Mac is running macOS version 13.0 or later.
Please follow the below instructions to connect to the eduroam network either
- for the first time, or
- if you are returning AND you have already removed any previous eduroam certificates
For instructions on to removing a previous eduroam certificate, please click here.
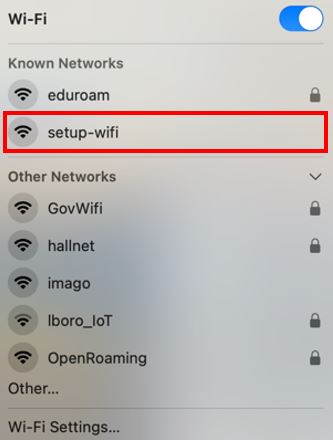
Step 1: Connect to setup-wifi network
Open your list of available networks from the bottom right of your taskbar and select “setup-wifi”. (You may see a message saying “setup-wifi has no internet access”. You can ignore this)
Note - setup-wifi is not available in the James France Building, West Park Teaching Hub, lecture theatres or the Library due to the high density of users in these locations. If you are unable to find the setup-wifi network, try moving around campus. You should find it without having to move too far.
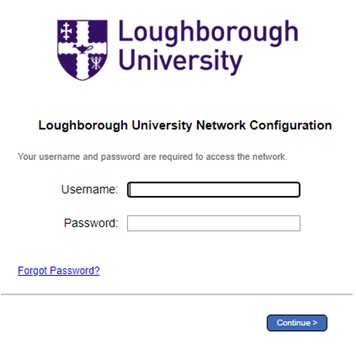
Step 2 : Visit the Cloudpath website
When you have connected to the setup-wifi network, follow the steps below.
- Open the Safari browser
- Visit https://cloudpath.lboro.ac.uk or click the “Cloudpath site” button below
- Enter your Loughborough University username and password
- Click Continue
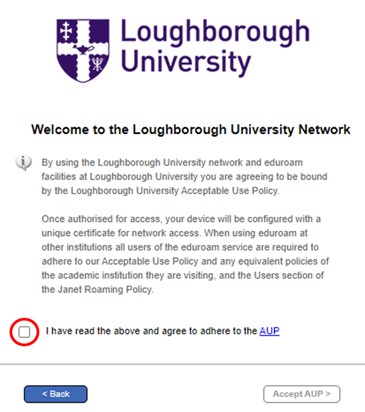
Step 3 : AUP – Acceptable use policy
Tick the box to confirm that you agree to the AUP, then click the “Accept AUP” button.
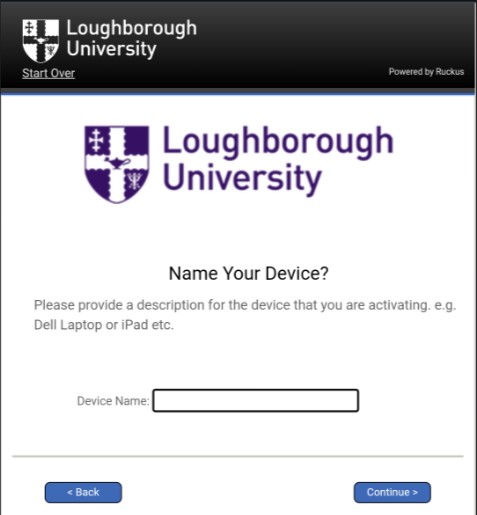
Step 4: Add your device
SETTING UP A NEW DEVICE FOR THE FIRST TIME
Give your device a suitable name, e.g. Macbook, then click Continue.
RECONNECTING A DEVICE WHICH HAS PREVIOUSLY CONNECTED TO EDUROAM
Select the appropriate device name from the list, then click Continue.
Step 5: Cable connection
You will now be prompted to select whether your device has a Wired Ethernet Port. Select “No” even if your device does have one.
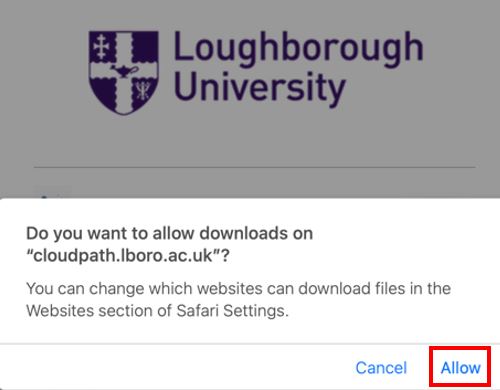
Step 6 : Downloading certificate
lick the Download for Mac 10.13 & Newer button.

Then make sure you allow downloads from Cloudpath site.
Step 7 : Review profile
You will be asked to review the profile.
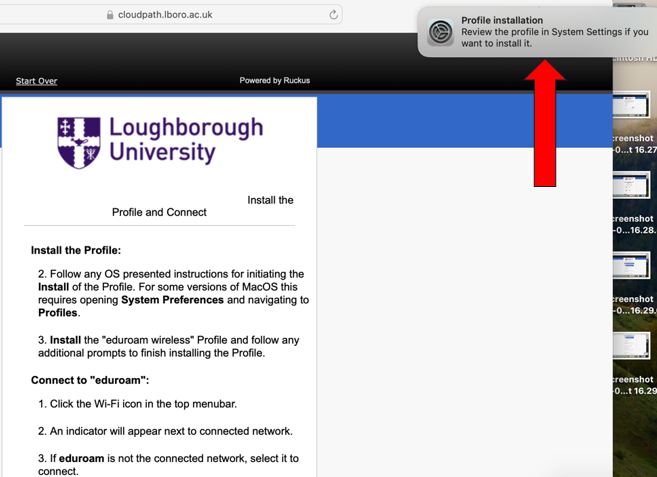
Click on the Settings cog on your taskbar, then search for “Profile”.
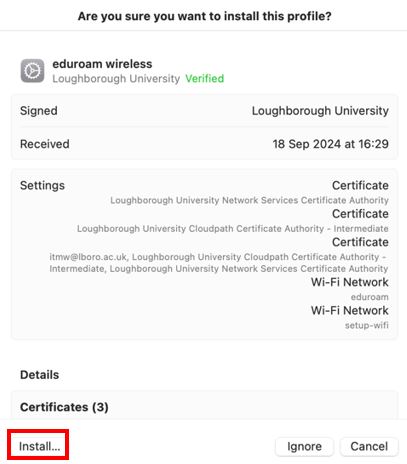
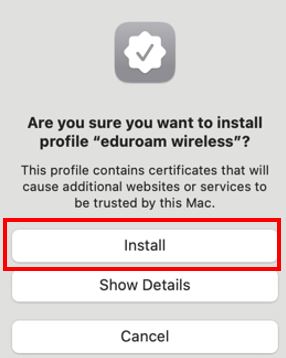
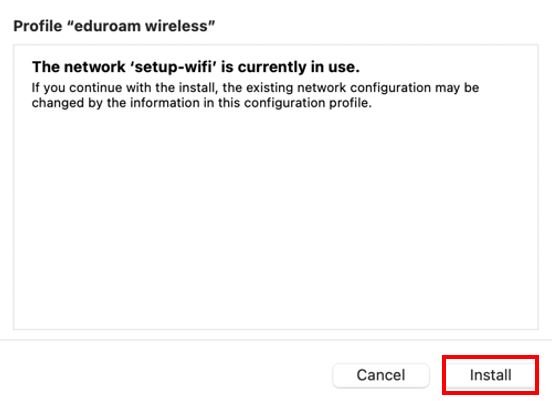
Step 8 : Install profile
Double click on the eduroam wireless profile:
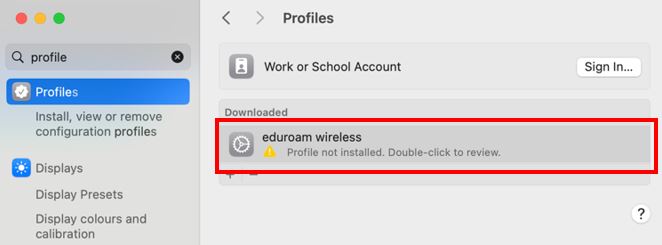
Then click Install on the next 3 screens. Enter your computer’s password after the 3rd one.
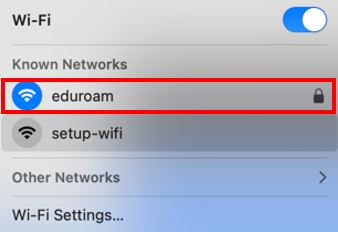
Step 9 : Connect to eduroam
Once the profile has been installed, you will see the eduroam wireless profile as shown. To connect to, select the Wifi logo at the top, and select eduroam from the network list.
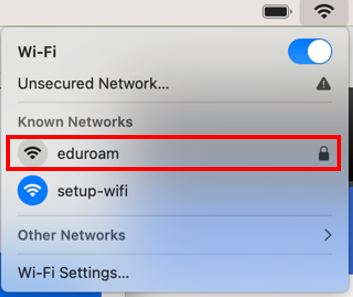
When successfully connected, you will see the WiFi logo for eduroam turn blue.
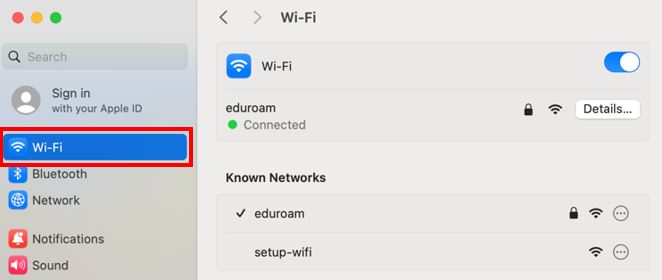
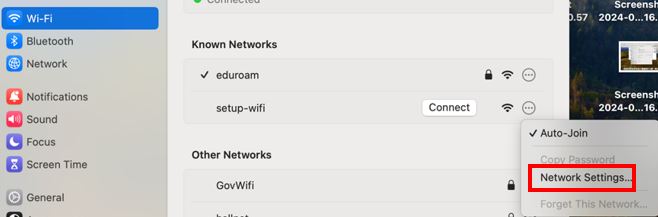
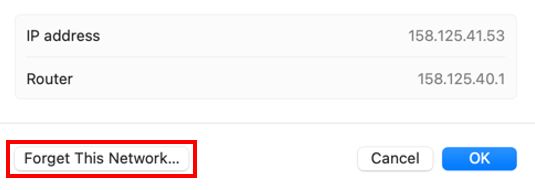
Step 10 : Finally, forget Setup-WiFi
Click the System Settings cog, and select Wi-Fi.
Click the 3 dots next to setup-wifi and select Network Settings.
Finally, select Forget This Network.
Troubleshooting Common Problems
When connecting your Mac to the Wi-Fi, there can be a number of issues that can cause problems. Below is a list of the most common fixes to try:
- Check the time and date settings – this can occur if you have been abroad and not updated your time zone
From iOS 15 and the next version of macOS (Monterey) Apple are introducing iCloud Private Relay. This is an always on VPN that tunnels traffic out via Apple servers and is part of the iCloud+ subscription.
Devices using this service will be unable to access internal campus resources, as the traffic will originate from external to the university. It also circumvents the protection we provide to protect campus users.
As such, we have decided to block this for on campus users. This means that any user with it enabled will get an alert saying that they need to either disable Private Relay for your network or choose another network.