How to connect my macOS device to the VPN
IMPORTANT
Before you can get connected to the VPN, you must have a working DUO Mobile (MFA) account, as you will need to approve a DUO push notification in Step 8.
If you need any assistance in setting up DUO, please click the button below for guidance.
You will also need to know the password for your computer, as you will be prompted to enter it several times during the installation.
Step 1: Download file
Please check that you do not have any prior installations of a VPN client installed, such as OpenVPN and/or TunnelBlick as this will prevent the Cisco Secure Client installer from running correctly. If you do, uninstall them first, then continue.
Click the Cisco Secure Client installer button below. This will take you to the Software Downloads page within LEARN.
First, sign into LEARN if you are not already signed in.
If this is the first time you have visited this page, click “Enrol me”, and accept the terms and conditions.
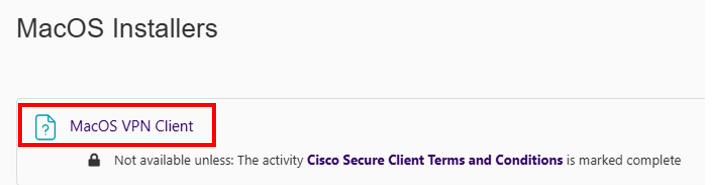
Once done, in the “MacOS Installers” section, click on MacOS VPN Client as shown to download the installer file (you may need to scroll down slightly to find this).
Step 2: Install the Cisco Secure Client
Double click on the file you have just downloaded:

Then double click on the installer file.

You now need to click through several screens:
- Introduction > Welcome to the Cisco Secure Client Installer – click 'Continue'
- Licence > Supplemental End User Licence Agreement – click 'Continue'
- Terms of the Software Licence Agreement – click 'Agree'
- Installation Type > Standard install on “<disk name>” – click 'Install'
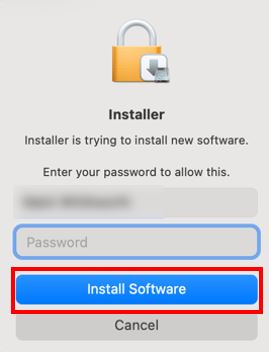
At this point you will need the password for your computer. Enter your password, then click 'Install Software'.
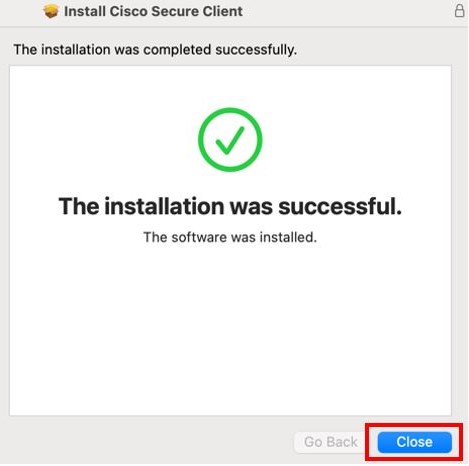
After a few seconds, you should see that the installation was successful. If so, click 'Close'.
If you see the below message instead:
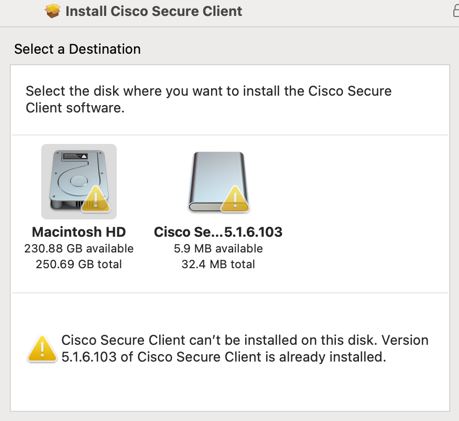
You need to remove the previous installation first. To do this:
First, follow steps 1-4 at the top of this page:
Cisco Anyconnect Manual uninstall Mac OS - Community Contributions - Hermes
If this doesn't work, or you can't find the folder called Cisco, cut and paste the below command into Terminal (you will need to enter your computer's password):
sudo /opt/cisco/secureclient/bin/cisco_secure_client_uninstall.sh
Return to Step 1.
Step 3: Enable AnyConnect VPN Service
**NOTE - If you see a box saying 'System Extension Blocked' at this point, skip to Step 4.
If you see a box saying 'AnyConnect VPN Service Not Enabled':
3a) Click 'Open System Settings' at the bottom.
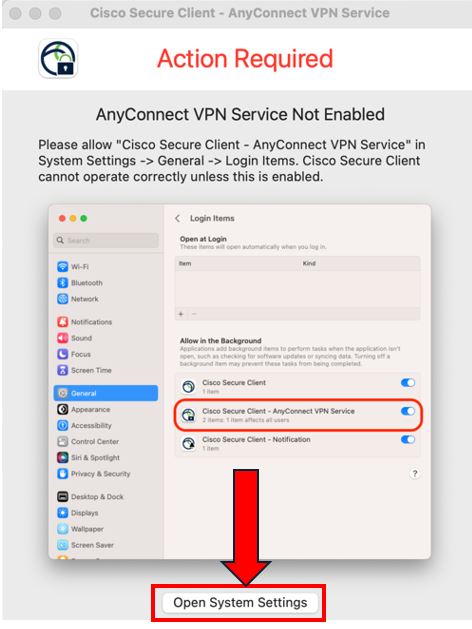
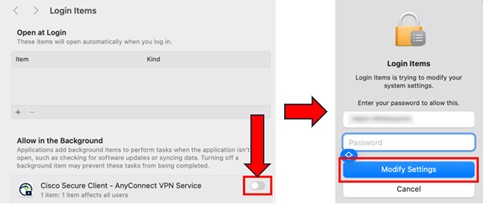
3b) Click the slider as shown, then enter your computer's password, then click 'Modify Settings'.
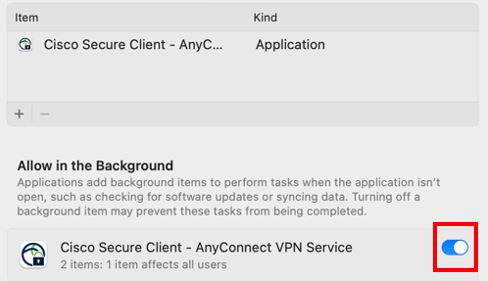
3c) The slider will now be toggled on.
Step 4: Allow System Extension
If you see the message 'System Extension Blocked', click 'Open System Settings'.
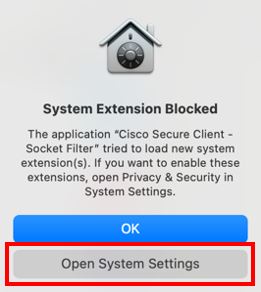
- Click 'Allow'
- Enter your computer's password, then click 'Modify Settings'
- Click 'Allow' again
Installation complete.
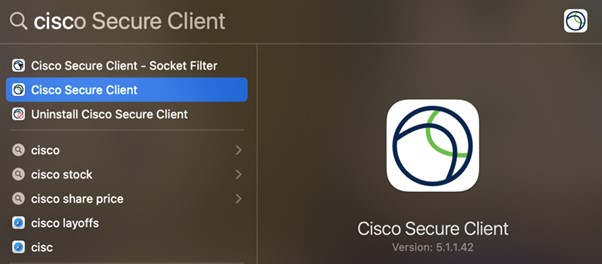
Step 5: Launch the Cisco Secure Client
Once you have successfully installed the Cisco Secure Client and allowed the System Extension, then type Cisco into the Spotlight Search (the magnifying glass icon on the top bar) and double click on Cisco Secure Client.
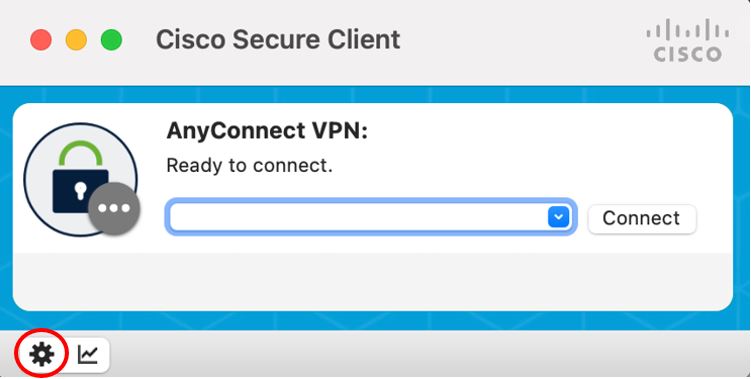
Step 6: Check settings
Before you connect to the Cisco Secure Client for the first time, please do the following:
1. Click on the small cog in the lower left of the window.
2. In the window which appears, make sure that Allow local (LAN) access when using VPN (if configured) is ticked, and then close the window.
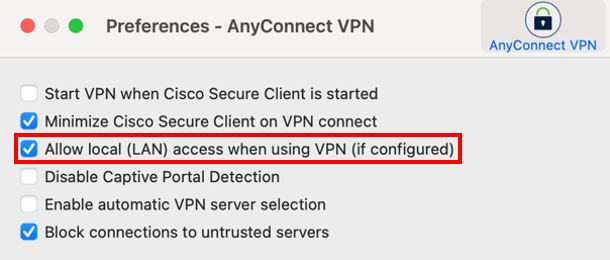
3. Close the Preferences window.
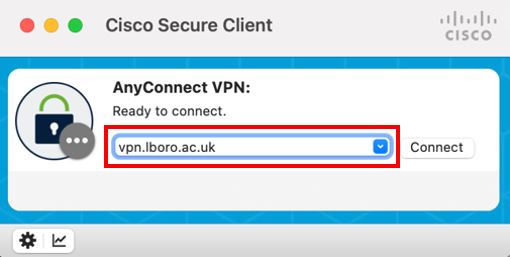
Step 7: First time connection
The first time you connect to the client, you will need to type
vpn.lboro.ac.uk
into the Cisco Secure Client box, as shown.
Once you have typed this in exactly as shown, press Connect.
NB – DO NOT attempt to visit vpn.lboro.ac.uk in a web browser. This will not work.
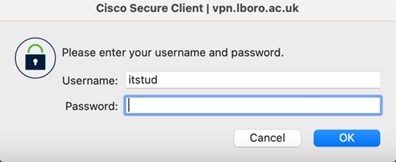
Step 8: Username/password and MFA authentication
After pressing Connect, a box will appear, asking for your Loughborough University username and password.
Make sure you enter your Loughborough University USERNAME, not your email address or student ID number.
After entering your username and password and pressing OK, the client will pause.
*** Now, check your mobile device for a DUO push notification, and approve it. ***
IMPORTANT – the Cisco Secure Client will NOT prompt you to “Check for a DUO push” – you just need to remember.
If you see a message saying “Authentication failed” immediately after pressing OK on your username/password, this means that either your username, your password, or both, is wrong. Please correct them, then try again.
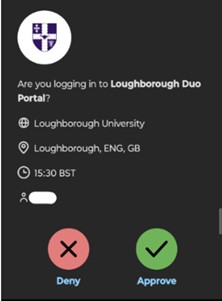
Step 9: Approve DUO push notification
Press 'Approve' on the DUO push notification, and the VPN client should finish connecting.
If you do not approve the connection within 50 seconds, you will see the message “Connection attempt has timed out. Please verify Internet connectivity”.
If you do not receive a DUO push notification at all, try the following:
- If you have more than one device registered with DUO, make sure you check all of your devices for the push notification.
- If you only have one device, but are not receiving the push notification, then open the DUO app on your mobile device FIRST, then try connecting to the VPN via the Cisco Secure Client.
- If neither of these options work, please contact IT Services, stating what type of device you are using.
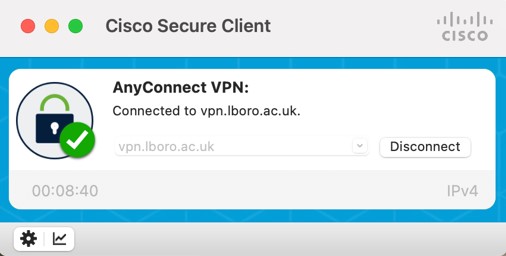
Step 10: Confirming successful connection
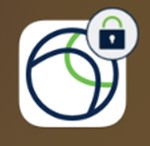
Once successfully connected, you will see a locked padlock on the Cisco Secure Client icon.
If you double-click on the icon, you will see a tick, and the words Connected to vpn.lboro.ac.uk
Step 11: Disconnecting from the VPN
When you no longer need to be connected to the VPN, simply press Disconnect.