How to connect my Windows laptop to eduroam
You will need to know your Loughborough University username and password before you can start this process.
To connect to eduroam, your device must be running a supported, up-to-date, and licensed operating system. Please ensure your device is using Microsoft Windows 11.
Please follow the below instructions to connect to the eduroam network either
- for the first time, or
- if you are returning AND you have already removed any previous eduroam certificates
For instructions on to removing a previous eduroam certificate, please click here.
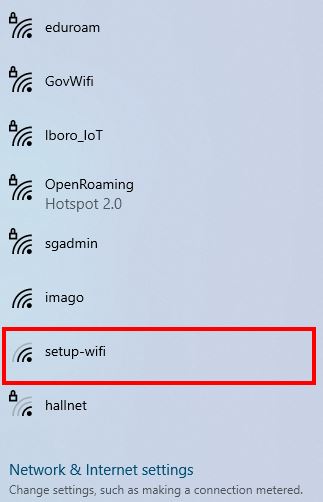
Step 1: Connect to setup-wifi network
Open your list of available networks from the bottom right of your taskbar and select “setup-wifi”. (You may see a message saying “setup-wifi has no internet access”. You can ignore this)
Note - setup-wifi is not available in the James France Building, West Park Teaching Hub, lecture theatres or the Library due to the high density of users in these locations. If you are unable to find the setup-wifi network, try moving around campus. You should find it without having to move too far.
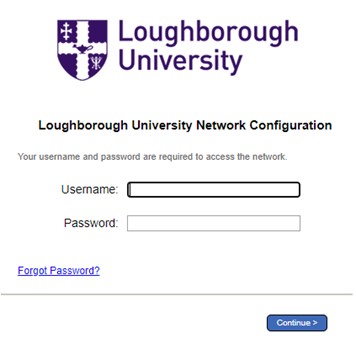
Step 2 : Visit the Cloudpath website
When you have connected to the setup-wifi network, follow the steps below.
- Open Google Chrome (other browsers may not allow the Cloudpath process to run)
- Visit https://cloudpath.lboro.ac.uk or click the “Cloudpath site” button below
- Enter your Loughborough University username and password
- Click "Continue"
Step 3 : AUP – Acceptable use policy
Tick the box to confirm that you agree to the AUP, then click the “Accept AUP” button.

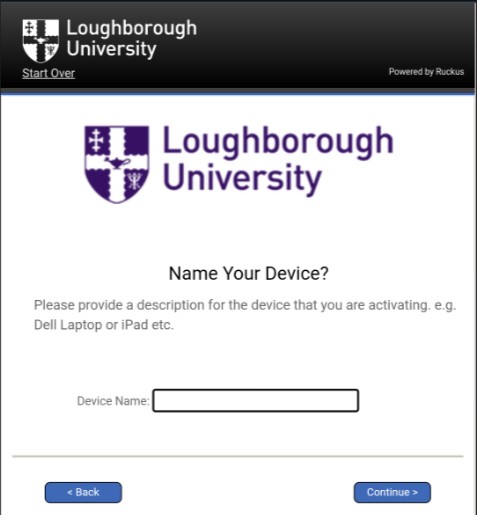
Step 4: Add your device
SETTING UP A NEW DEVICE FOR THE FIRST TIME
Give your device a suitable name, e.g. Dell laptop, then click "Continue".
RECONNECTING A DEVICE WHICH HAS PREVIOUSLY CONNECTED TO EDUROAM
Select the appropriate device name from the list, then click "Continue".
Step 5: Cable connection
Does your device have a Wired Ethernet Port?
You will now be prompted to select whether your device has a Wired Ethernet Port. Select "No" even if your device does have one.
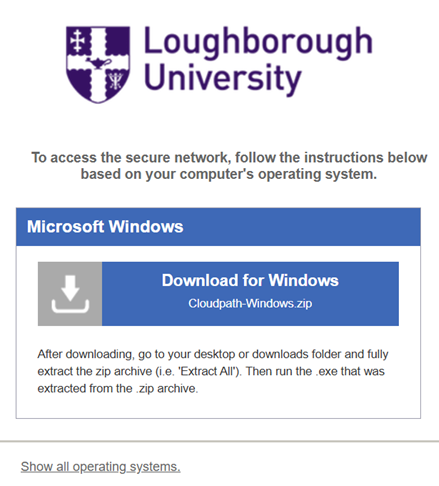
Step 6 : Configure Your Device
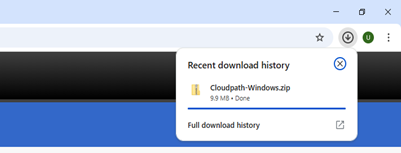
Click the "Download for Windows" button.
Now double-click on the downloaded .zip file to open it.
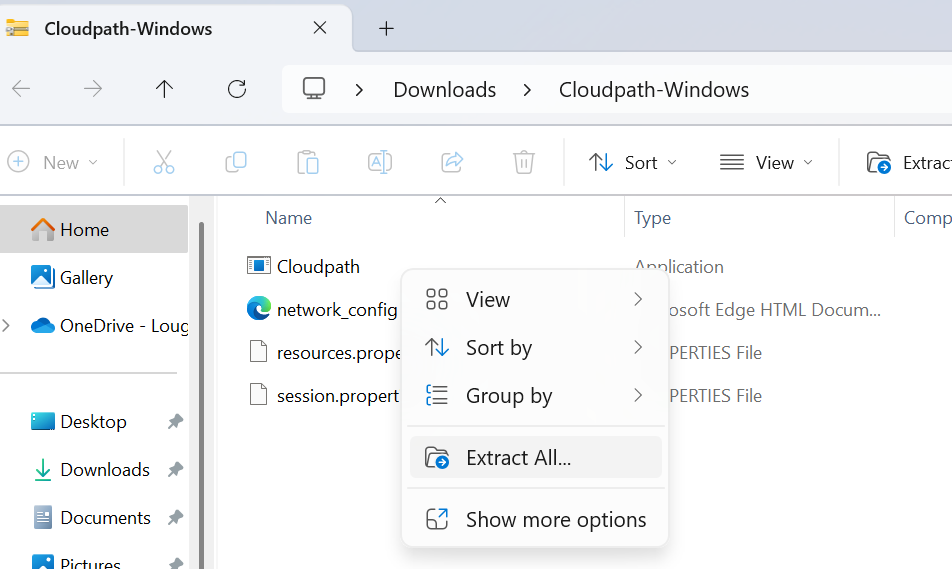
Right-click on the “Cloudpath” file and select “Extract all” from the drop-down menu.
You need to fully extract the zip archive (i.e. “Extract All”).
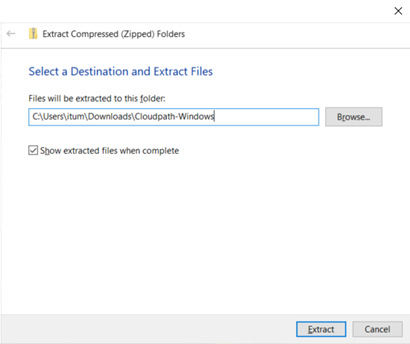
Select a destination and extract files - Select “Extract”
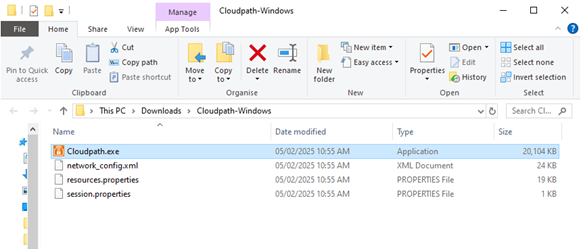
Then double-click on the “Cloudpath.exe” file that was extracted from the .zip archive to open the application.
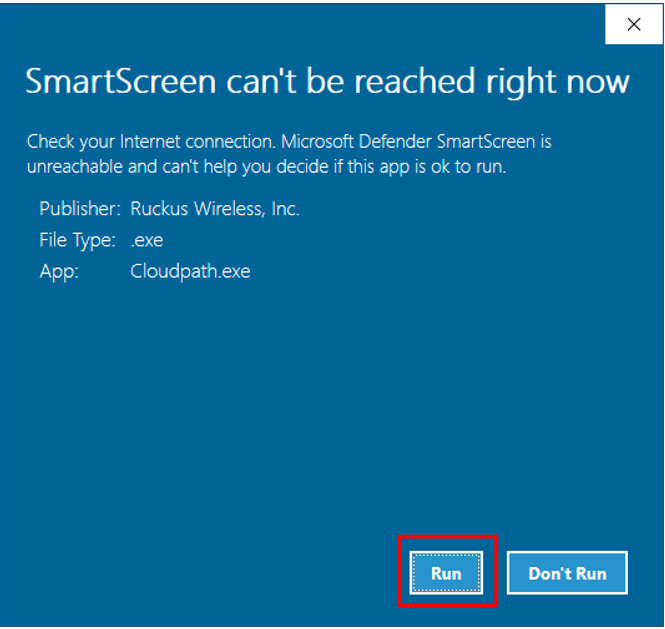
Step 7 : Run the application
A pop-up box will appear – click "Run".
Please Note: If the Cloudpath Loader does not run, please refer to our troubleshooting tab at the top of this page.
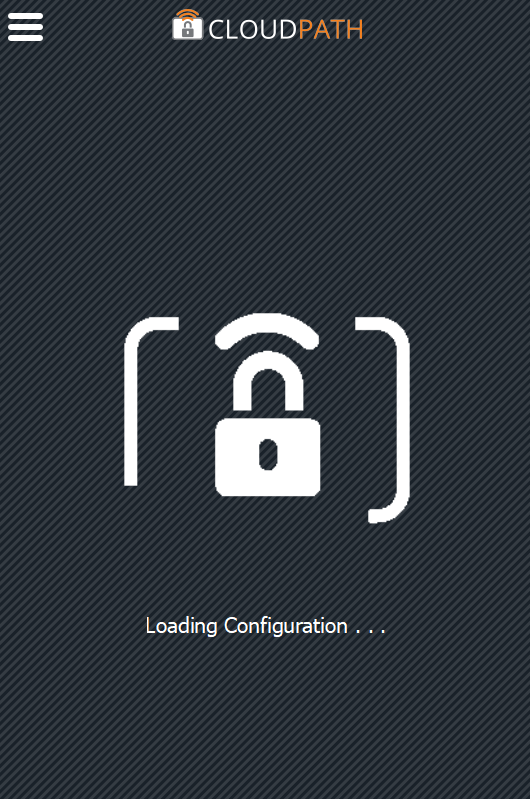
The Cloudpath Loader will begin.
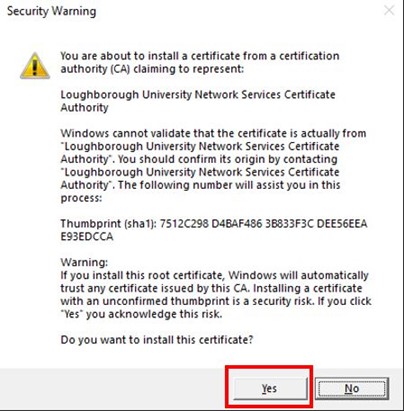
You might be asked to confirm that you want to install – click "Yes".
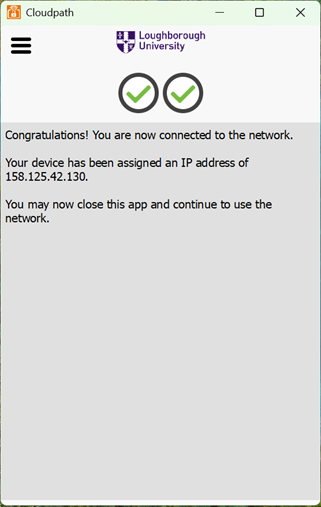
Step 8 : Successful connection to eduroam
If the connection is successful, you will see two green ticks, as shown. Your device will now be connected to the eduroam, and will reconnect automatically in future.
If you DO NOT see two green ticks at this point, please contact IT Services.
If you DO see two green ticks, but your device does not automatically connect to eduroam:
- Open Wi-Fi settings
- Click on the eduroam Wi-Fi (if it hasn’t already selected)
- Wait for it to connect
Step 9: Forget setup-wifi
Once connected to eduroam, you should forget the setup wi-fi network. This will ensure your computer does not try to connect to it again in future.
- Click on the Start Windows menu button in the bottom left corner
- Click on the cog icon for "Settings"
- Click on the "Network & Internet" menu
- Click on the "Wi-Fi" menu on the left
- Click on "Manage known networks"
- Click on "Setup-WiFi" and click "Forget"
Troubleshooting common problems
When connecting your Windows laptop to the Wi-Fi the can be a number issues that can cause problems. Below is a list of the most common fixes to try:
- Check the time and date settings - this can occur if you have been abroad and not updated your time zone
- Windows S mode - will not allow Cloudpath to install and configure. You can switch out of this mode following the instruction via the link below