How to Connect to a Group Workspace
Documents being used centrally within a School, Professional Service, or for collaboration will be generally be stored on Microsoft Teams or University Group Workspace.
Group Workspaces were used for the sharing of work or study-related files. Within each workspace, there is a list of users with varying permissions: either read, read & write or managers (they maintain the list of users). There are no quotas, but there are limits to storage - managers should manage the area. Existing Group Workspaces will be set up automatically if you use a Staff Managed Windows computer.
Group workspace on Windows Staff Managed
Instructions on how to connect to a Group Workspaces
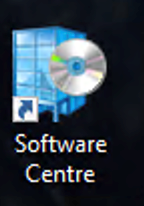
- Open Software Centre using the icon located on the desktop which looks like the image below:
- Once the Software centre opens, find the application: Workspace Shortcut Mapper and click on Install

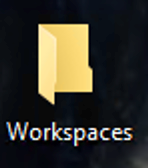
- Once the application has installed you will then see a folder on the desktop similar to the image below with shortcuts to the workspaces, you have access too inside.
Locate Workspace name
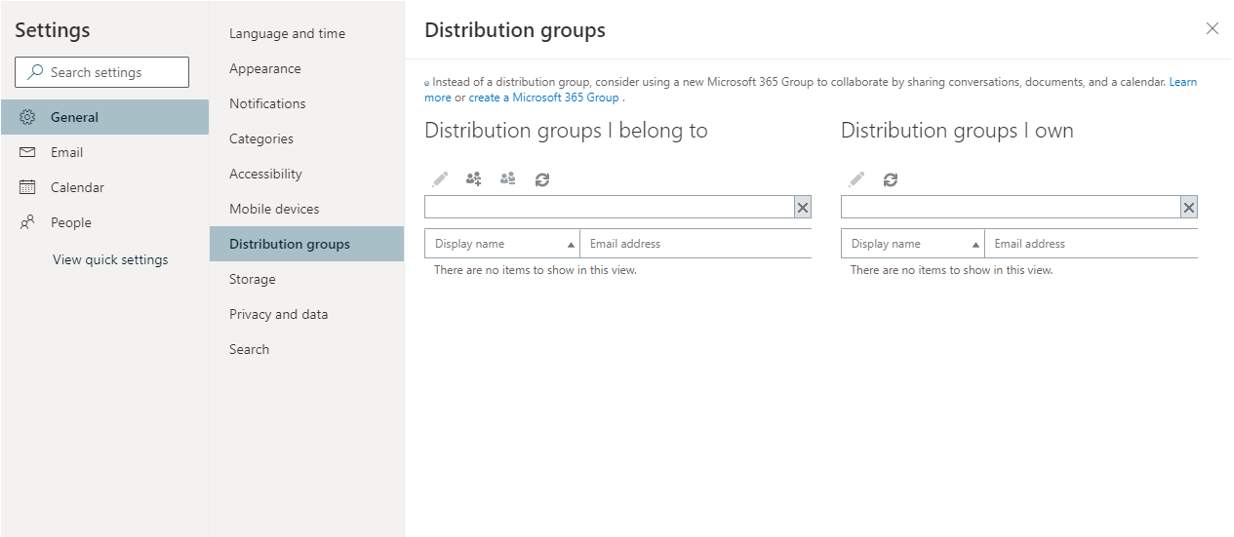
Scroll down the ‘Distribution groups I belong to’ to groups starting ws. (ws.=workspaces)
Each of these is a the name of a group workspace when you remove the starting "ws." and the trailing ".ReadWrite" and or ".ReadOnly".
If you are only in the ".Managers" and neither of the others you cannot access the Group Workspace.”
Note: Above may not display Group Workspaces where groups have been nested within other groups to give access. If you cannot see a Group Workspace that you have been given access to, please contact the IT Service Desk who can provide a complete list
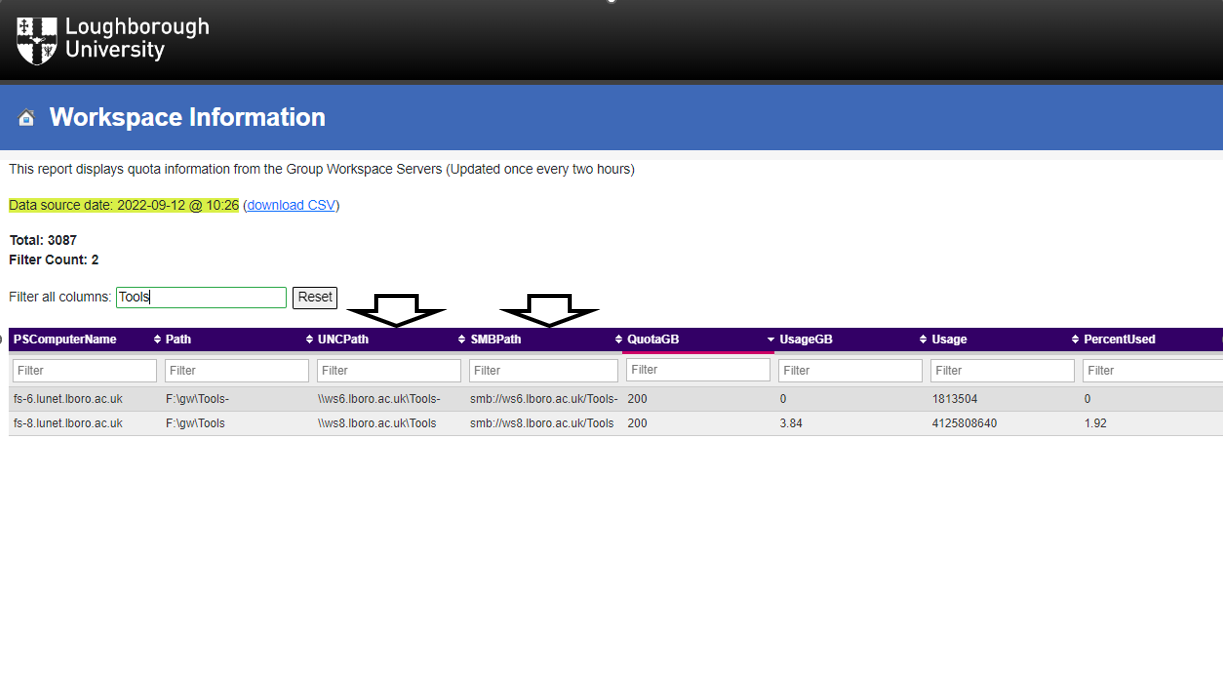
Copy address
Once you have the details you require,
- Copy and paste into the relevant file manager (not web browser) depending on your operating system
- UNCPath (primarily for Windows File explorer)
- SMBPath (primarily for Mac Finder)
Instructions on how to connect to a Group Workspaces
Please use the instructions below to map to Workspaces from a Windows device.
File explorer
Open file explorer
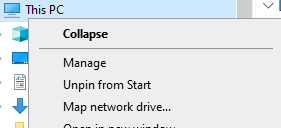
- Right click on This PC from the options on the right hand side.
- Click Map Network Drive and wait for the Map Network Drive window to open
Workspace name
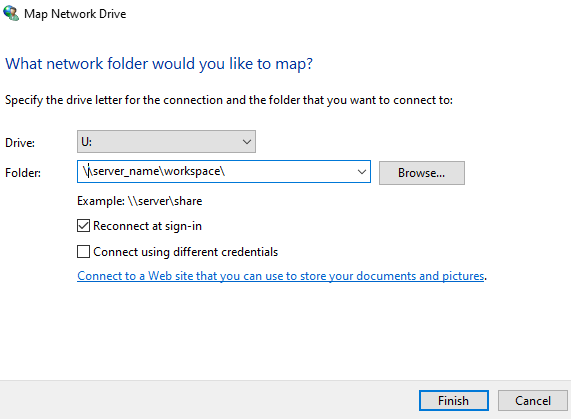
Select a letter from the Drive drop down list (e.g., U:)
- Type the address of the Group Workspace, which you should have obtained from the previous tab and will be in a similar format to: \\wsn.lboro.ac.uk\workspace
Note: If you place a tick in the box marked Reconnect at sign-in, the workspace will automatically re-map each time you login
Username and password
You will now be prompted to authenticate
- Type in your University username in the format of lunet\abc123 (where "abc123" is your username) and your University password
- Click OK and your workspace will now appear as a shortcut under This PC
Instructions on how to connect to a Group Workspaces
Please use the instructions below to map to connect to a Workspaces using a Mac.
Note: Your Group Workspaces will be automatically mapped if you are using a university managed device.
Connect to Server
From the Finder menu:
- Select Go
- Then select Connect to Server
Mac server address
Fill in the Server Address which you should have obtained from the previous tab.
On Mac the \ needs to be swapped to / and the file path needs to start with smb: see example below:
smb://servername.lboro.ac.uk/workspacename
Username and password
macOS
Type in your University username in the format of lunet\abc123 (where "abc123" is your username) and your University password.
You can add to your list of favourites:
- From the Finder, choose Go
- Then select Connect to Server
- Enter the network address and click the + button
Workspace
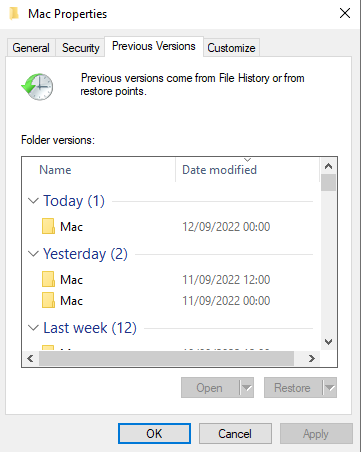
Browse to the workspace folder you wish to restore:
- Right click and select Properties
- Select the Previous Versions tab
Restore date folder
Choose the most appropriate restore date folder
- Double click on the folder to view the contents
NOTE: Previous Versions go back over the previous 30 days at which point after that, your old data is irretrievable.
Copy the folder or individual files
Right-click on the files or folders you wish to restore and select copy.
You can then browse to a folder and paste the restored files/folders in to the new location.